Note: The actual file name that will be sent to you will be different from what was used here. For example, if your name is john, your package will be sent as john package. In this tutorial the file name used was "your name package". So wherever you see "your name package ", it means john package.
This tutorial is divided into four parts.
- Downloading the program
- Installing the program
- Running the program subsequently
- Burning the program to a CD
Part 1: Downloading the program
Step 1: In your email, you will find two links. Click the first link, you will be directed to a web page. When the page finishes loading, at the top, you will see an arrow pointing downwards, click to begin the download. Check the progress of the download by pressing CTRL + J on your keyboard.
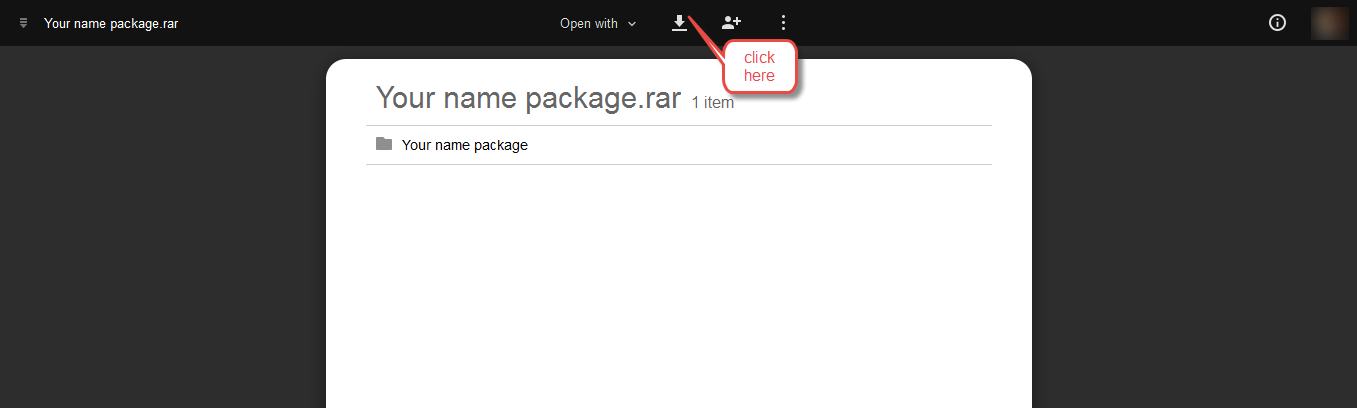
Step 2: Once the download is complete, copy the downloaded file to your documents folder.
Step 3: If you don't have winrar software installed. Go back to your email, click on the second link, you will be directed to a web page. When the page loads, at the top, you will see an arrow pointing downwards, click to download. Check the progress of your download by pressing CTRL + J on your keyboard.
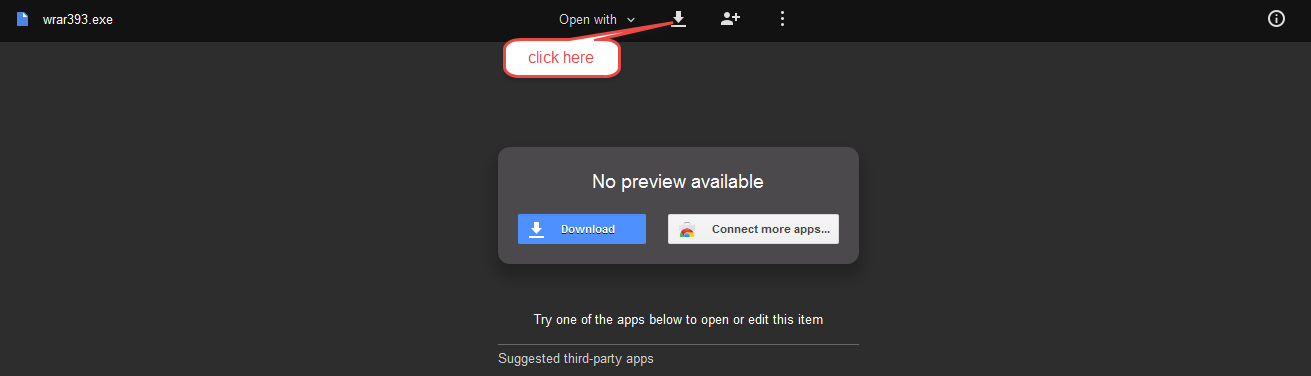
Step 4: Once the download is complete, copy the downloaded file to your documents folder.
Part 2: Installing the program
Step 1: Go to your documents folder where you just copied the two downloaded files, you will see the winrar393.exe file, double-click the file to install it.
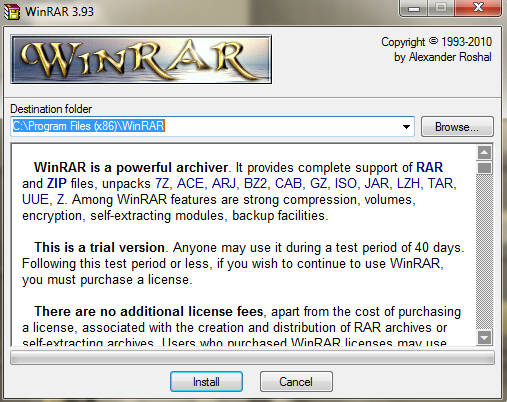
Click the Install button
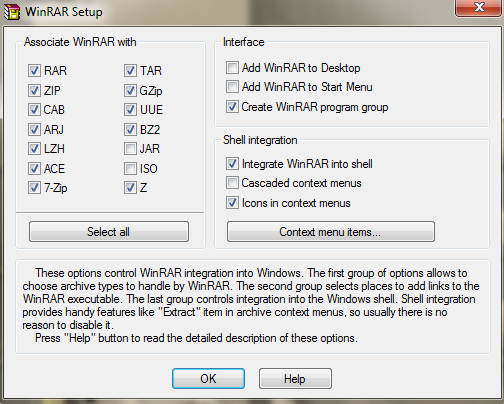
Click the Ok button
On the next screen, click done. If it pops a message saying you installed a 32bit winrar version on 64 bit. Just click the ok button.
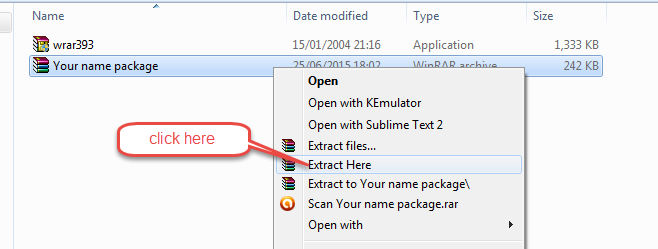
Step 2: Go back to your documents folder, you will see the other file you downloaded named "Your name package", right click Your name package, from the popped up option, select Extract Here.
A window will pop up showing the extraction progress. When it finishes the extraction, the popped up window disappears. The result of this extraction is a folder named "Your name package".
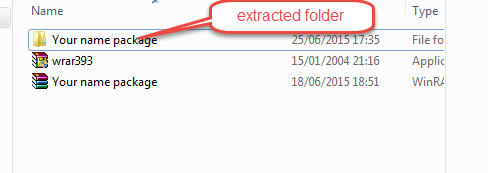
Extracted folder
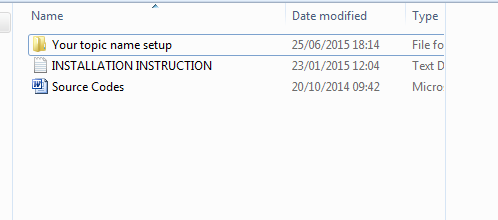
Step 3: In the documents folder, open the newly extracted folder named "Your name package", you will see a folder named "Your topic name", installation instruction and appendix/source code files.
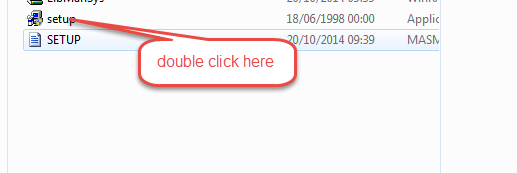
Open "Your topic name setup" folder, you will see a file named setup. Double-click it.
Double-clicking the setup file starts a wizard. Follow the steps in the wizard, when you come across a screen that has the OK button, click it. You will be taken to a screen that has the computer icon.
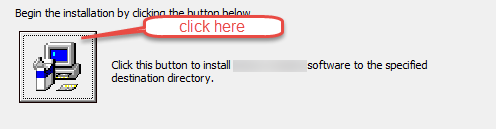
Click the computer icon, you will be taken to a screen where you are to click continue or cancel. Click continue.
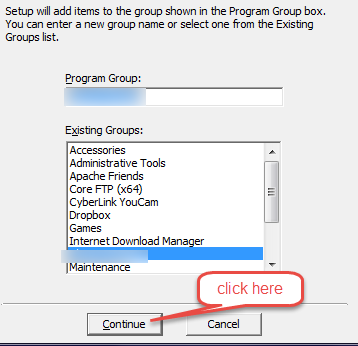
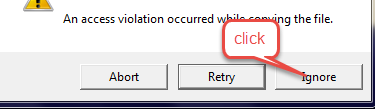
After clicking continue, you will be guided through the remaining steps of the wizard. If you come across any screen that has the Abort, Retry and Ignore button. Select Ignore.
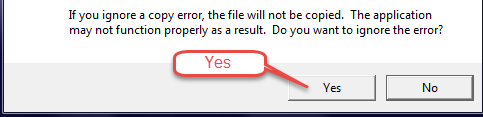
If the screen has Yes, No button. Click on Yes
This should successfully install the program.
Part 3: Running the program subsequently
To run the program, after booting your system, go to Start menu, Locate the program name (which should have the name of your topic), click on it. A screen having the project topic, your name and reg no would come up. Click on the load button, you will be directed to the login page. Supply the login credentials and hit the ok/enter button.
Part 4: Burning the program to a CD
This part of the tutorial teaches how to burn the program to a CD
Step 1:Insert a writable disc, such as a CD-R, CD-RW, DVD-R, DVD-RW, or DVD+RW disc, into your computer's CD-RW Drive or DVD-RW Drive.
Step 2:In the AutoPlay dialog box that appears, click Burn files to disc using Windows Explorer.
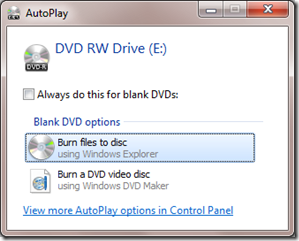
If the AutoPlay dialog box doesn't appear, click the Start button, click Computer, and then double-click your CD-RW Drive or DVD-RW Drive.
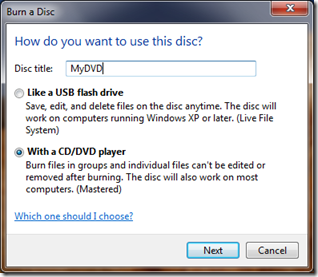
Step 3: In the Burn a Disc dialog box, type a name for this disc in the Disc title box, click With a CD/DVD player, and then click Next.
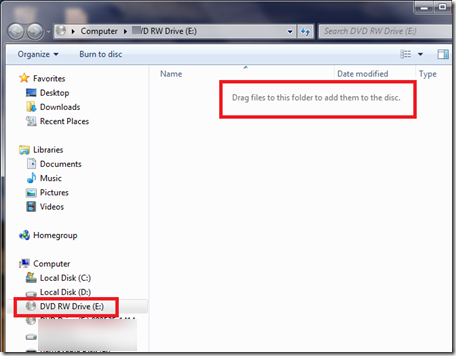
Step 4: Open the documents folder, open the newly extracted folder named "Your name package", you will see a folder named "Your topic name setup", installation instruction and appendix/source code files, copy "Your topic name setup"
Paste or drag the setup folder into the empty disc folder.
Step 5:On the toolbar, click Burn to disc, and then follow the steps in the wizard.