Create the Call to action row/section
On the preview of the home page, click the "Edit page" link

If you have left the preview of the home page, you can go back to the home edit page by going to Dashboard > Pages > All Pages, Scroll down to Homepage and click on it or the edit link, it will take you to the edit home page.
1. Click the "Add Row" button.

2. In the "Add New Row" dialog. Change the Set row layout from 2 to 1, then click the "Insert' button.

3. Now we have a new row, hover over the ranch and click the "Edit Row" link.

4. In the "Edit Row" dialog, on the right-hand side of the dialog, click the "Theme" section to expand it, in the top/bottom padding enter 50,

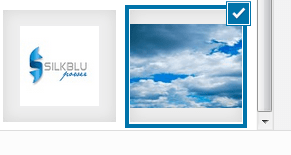
5. Scroll down to Background Image, click the "Select Image" button, it will pop up the "choose" dialog, select a photo from the media library and click the "Done" button.
6. Scroll to down to "Row Layout", select Full Width, click the "Done" button.
7. Click the "Add Widget" button, it will pop up the "Add New Widget" dialog, select the "Layout Builder" widget, it gets inserted in the row you just created.
8. Hover over the "Layout Builder" widget,

Click on the edit link, it will pop up the "Layout Builder" dialog.

9. Add the first row for this widget by clicking on "Add Row" button, change Set row layout from 2 to 1, click "Insert" button.
10. Click on the "Add Widget" button.
11. In the "Add New Widget" dialog, Select the "Text" widget. it gets inserted in the row you just created.
12. Hover over the "Text" widget, click the edit link, it will pop up a dialog, enter a title like "FIND OUT MORE ABOUT US", click "Done" button.
Edit this first row by hovering over the ranch and clicking on the "Edit Row" link.

In the Edit Row dialog, click the Theme section, for the top/bottom padding enter 0, scroll to down to the Color section, click the "Select Color" button, enter "#2368ea" in the textbox, click the "Done" button.
Add the second row for this widget by clicking the "Add Row" button, Set row layout to 2, click "Insert" button.
Click the "Add widget" button, select the "Sydney FP: Call to action" widget, click the "Duplicate" link.

Drag the widget to the other side of the row.

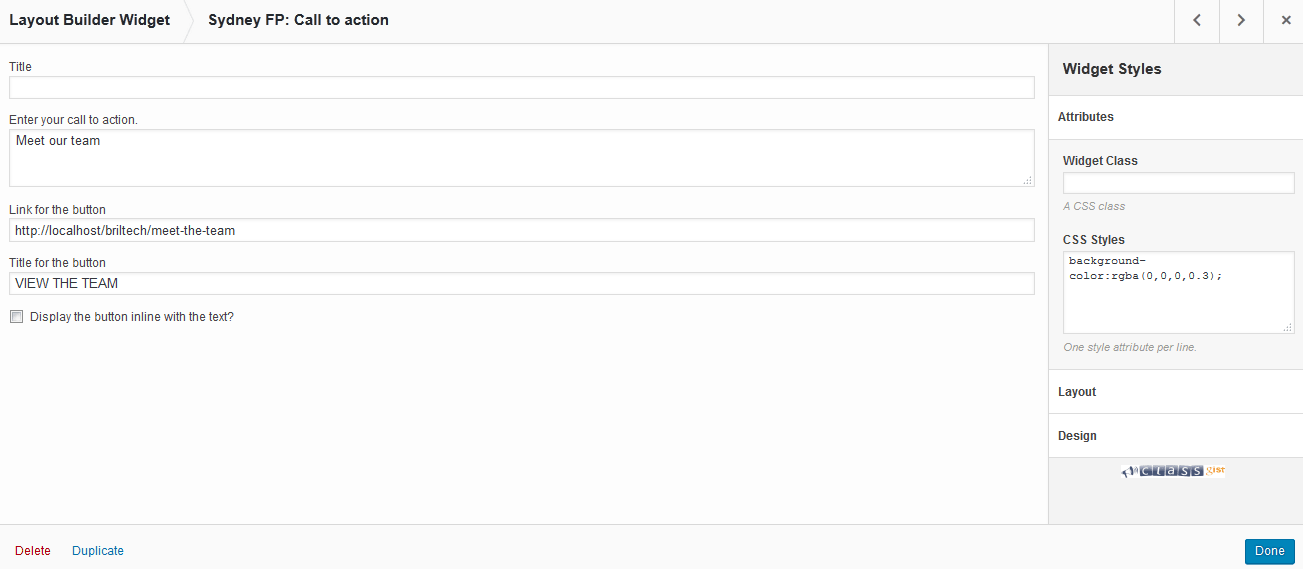
Hover over the left "Sydney FP: Call to action" widget, click the Edit link.
In the dialog, leave the title blank, enter a description like "Meet our team" in the Enter your call to action textbox, enter the URL address "localhost/briltech/meet-the-team" in the "link for the button" text box(employees page will be created in the create the employees page), enter a title like "VIEW THE TEAM" in the "Title for the button" textbox. Go to the right hand side, click the "Attributes" section to expand it, in the CSS Styles textbox type "background-color:rgba(0,0,0,0.3);", click the "Done" button.
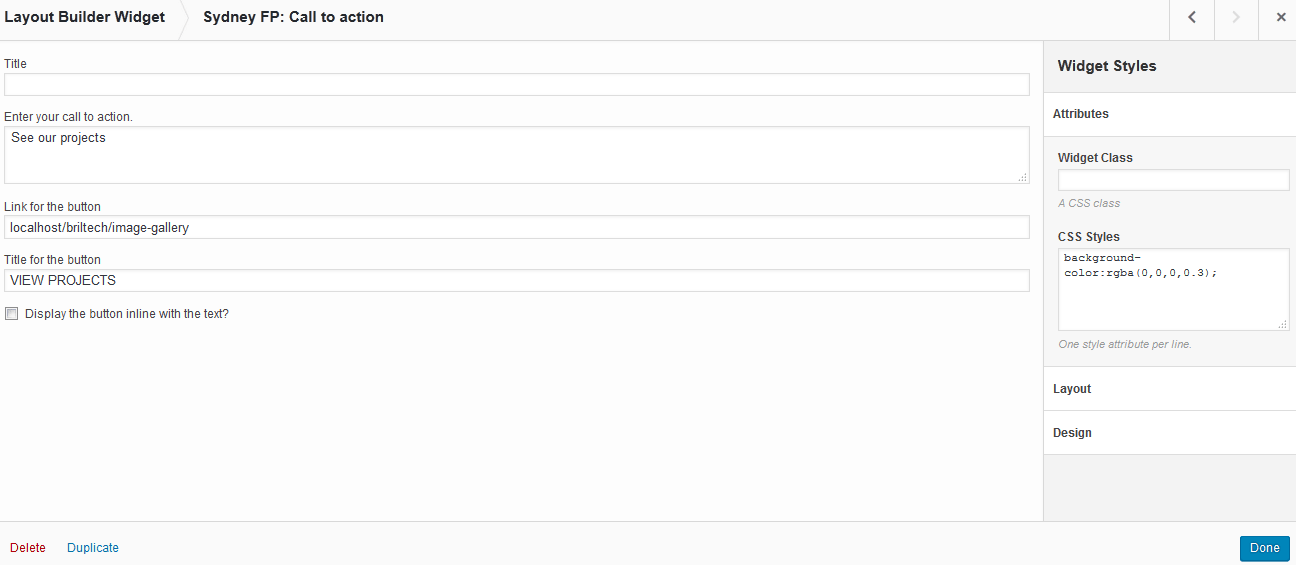
Repeat the steps to edit the second widget on the right, enter a description like "See our projects", enter the URL address "localhost/briltech/image-gallery" in the "link for the button" text box. enter the title "VIEW PROJECTS" in the "Title for the button" textbox. Go to the right hand side, click the "Attributes" section to expand it, in the CSS Styles textbox type "background-color:rgba(0,0,0,0.3);", click the "Done" button.
Edit the second row, Hover over the ranch of the second row and click the "Edit Row" link.

Go to the right, click the Theme section to expand it, in the top/bottom padding, enter 0, click "Done" button.
Click "Done" button.
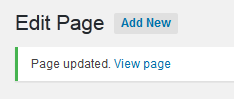
Click "Update" button to save changes. You can click the "View Page" link to see the changes you just made.
What Is Next?
Step by Step
This tutorial is part of a series that walks you through creating your first website or blog using wordpress.
Next Step - 8. Create the Latest/recent blog post row/section
Previous Step - 6. Creating rows/sections for adding widgets on the home page
Start from the beginning - Create your first website or blog using wordpress