The home page is made up of About the services row/section, Call to action row/section, Recent blog posts/ latest news row/section and footer section.
We will be creating the following rows/sections for the home page
About our services row/section
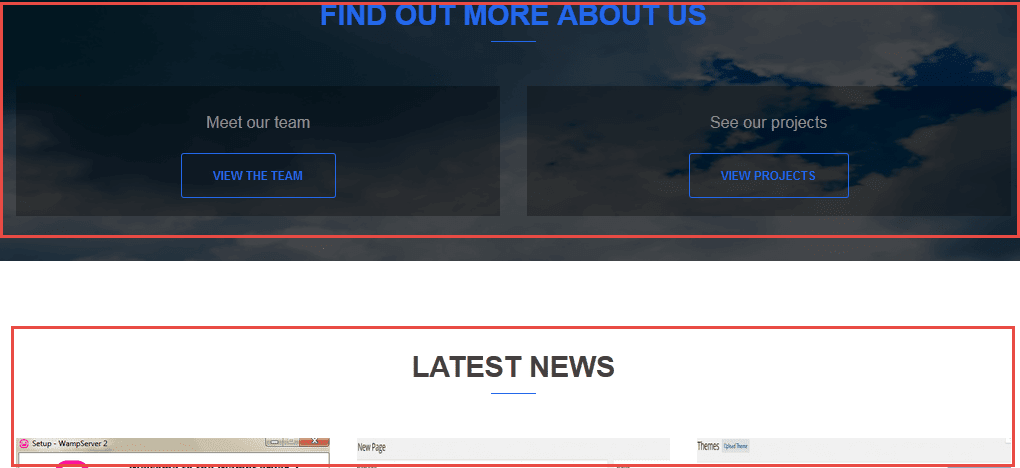
Call to Action row/section
Latest/recent blog posts row/section
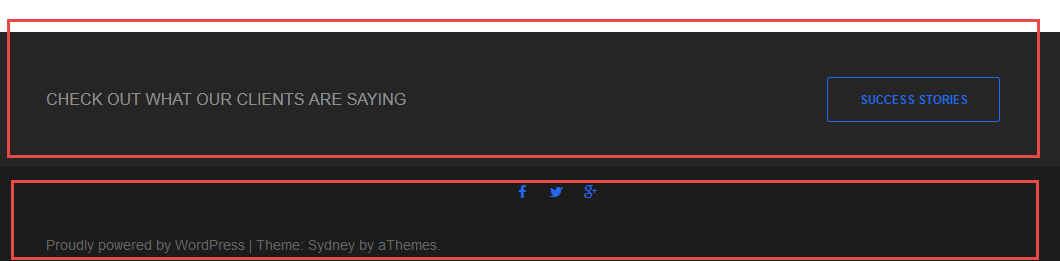
Another call to action row/section
Footer section
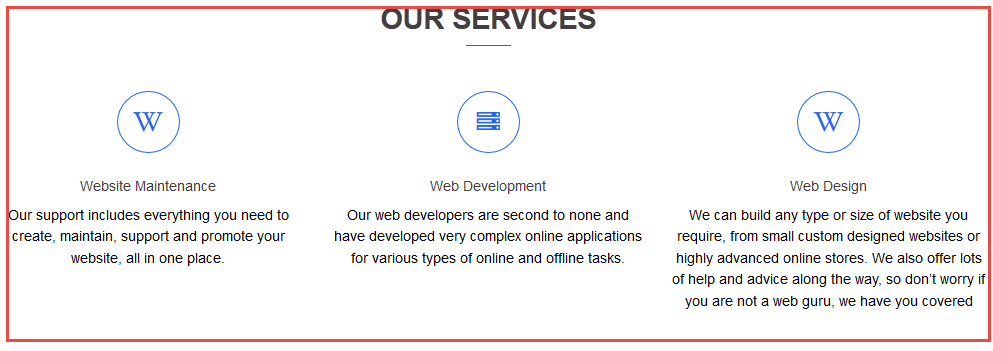
Create the About the services row/section that will display the information about the services rendered by the company
a. Create services that the company render
Go to Dashboard > Services > Add New Service, it will take you to the "Add New Service" Page.
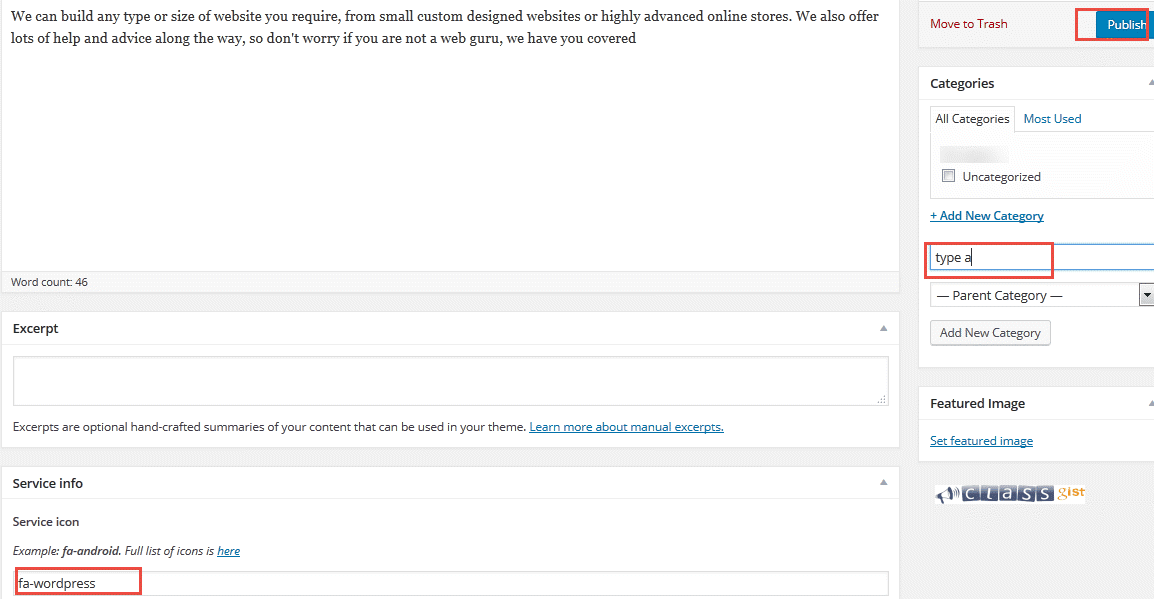
Type title like "Web Design" for the product or service, in the textarea under the title, type a short description of the product or service. Scroll down to the "Service icon" section, on the service icon, click the here link, it will take you a page, where you will select the type of icon you want. Copy the icon text. go back to your WordPress dashboard and paste in the text box. For example, you can paste this text "fa-WordPress" in the text box. In the service link, you can paste a URL which will redirect users to another page when they click on the service icon.
Go to the Categories Section at the right side of the page, click the "Add New Category" link, in the text box, enter "type a" or any name you want the category to have, then hit enter on your keyboard. Click the "Publish" button.

Create another service by clicking the "Add New" button.
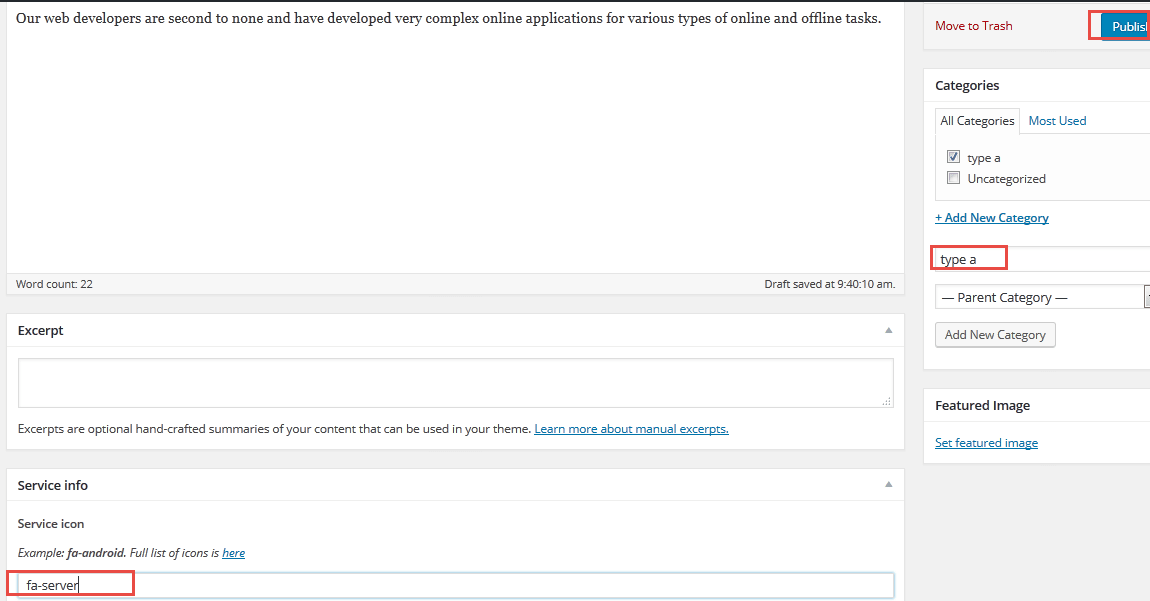
Repeat the previous step - type a new service title, enter description, enter a name for the service icon, check the check box named "type a", then click the publish button. You can repeat this step depending on how many services you offer. For this tutorial, add one more service, making it three services that will be displayed on the home page. When you are done creating the third service, you can check the number of services you have created by going to Dashboard > Services > All items, it will take you to the "Services" page, which displays all the services you have created.

b. Create the About the services row/section
Go to Dashboard > Pages > All Pages, it will take you to the "Pages" page, Scroll down to Homepage and click it or the edit link, it will take you to the edit home page.

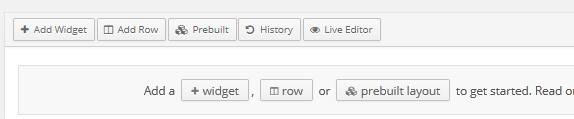
Click the "Page Builder" tab.
Click the "Add Row" button.
In the "Add New Row" dialog. Change the set row layout from 2 to 1, then click the Insert button.

Now we have a new row, Click the "Add Widget" button.
In the "Add New Widget" Dialog, select the Sydney Theme Widgets on the left, click the "Sydney FP:Services Type A" widget, it gets inserted in the row you just created.

Hover over the "Sydney FP:Services Type A" widget, click the edit link, it pops up a dialog,

In the Title, enter "Our Services", enter "type a" in the "Enter the slug for your category or leave empty to show all services" textbox, click the "Done" button.
Click the "Update" button.
You can preview your homepage to see the About services displayed by going to Briltech > Visit Site.

Go back to the Dashboard page by going to Briltech > Dashboard.
What Is Next?
Step by Step
This tutorial is part of a series that walks you through creating your first website or blog using WordPress.
Next Step - 7. Create the Call to action row/section
Previous Step - 5. Customizing the home page
Start from the beginning - Create your first website or blog using WordPress